Render
This is Cardinal3D’s realistic, globally illuminated renderer, capable of creating images of complex scenes using path tracing.
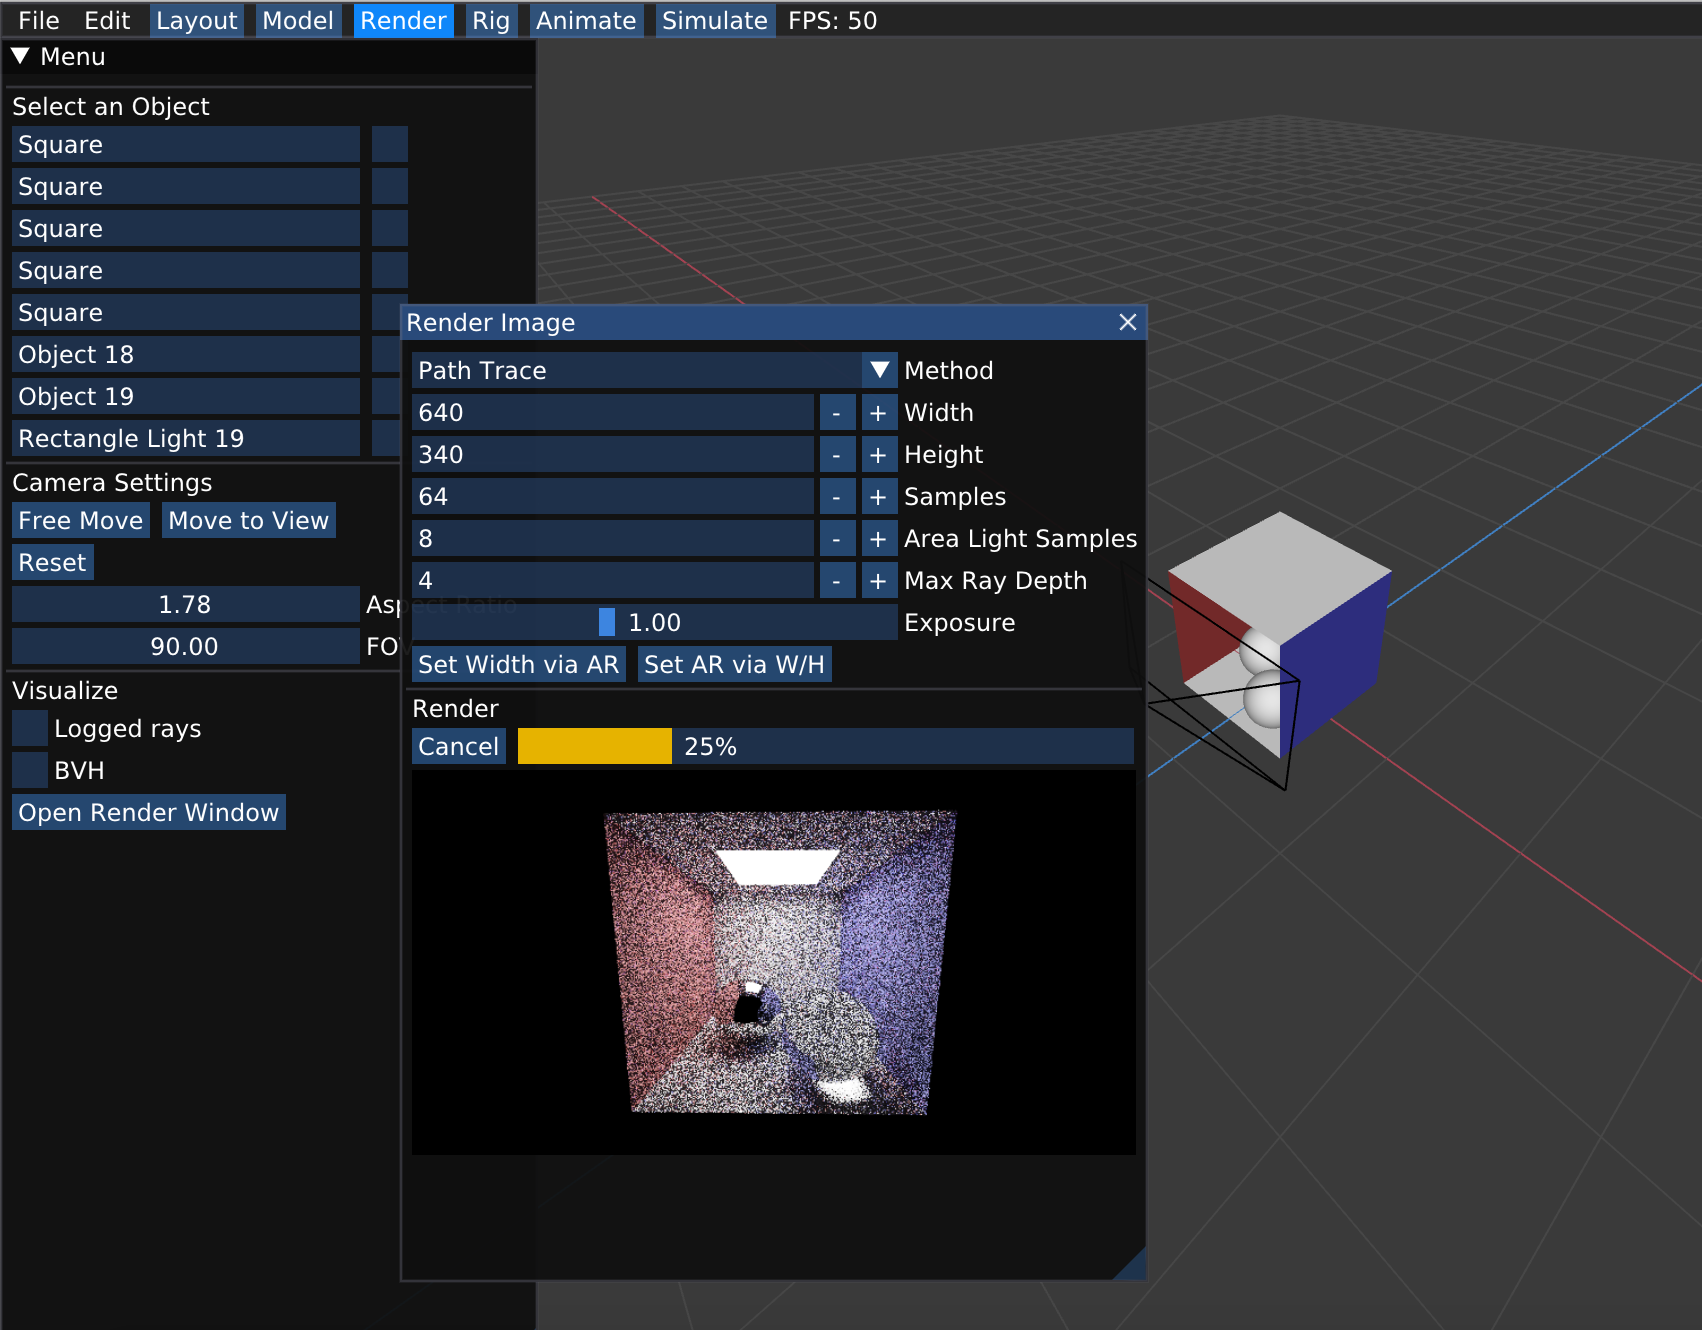
Render Window
In render mode, click on “Open Render Window”, and you will be able to set the parameters to render your model. Enjoy the excitement of seeing the images becoming clearer and clearer ;-)
Moving Camera
When viewing meshes, the camera parameters are determined interactively by how you click/drag the mouse. However, when rendering using the path tracer, the camera is determined by a seperate camera that represents the position, view direction, field of view, and aspect ratio with which to render the scene. These parameters are visually represented by the camera control cage, which shows up as a black wire-frame pyramid that traces out the unit-distance view plane. Note that changing camera settings (e.g. field of view) will adjust the geometry of the camera cage.
The easiest way to set the render camera is to set it to the current view. To move the render camera to the current view, click “Move to View.” This will reposition the camera so that it has exactly what you have on screen in view.
To freely move the camera without updating its field of view/aspect ratio to match the current viewport, click “Free Move,” and use the normal 3D navigation tools to position the camera. When you are done, click “Confirm Move” or “Cancel Move” to apply or cancel the updated camera position. Feel free to play around with the field of view (FOV) and aspect ratio (AR) sliders while in the free move mode - they will adjust your current view to use these values, so you can see how exactly the effect the visible region.
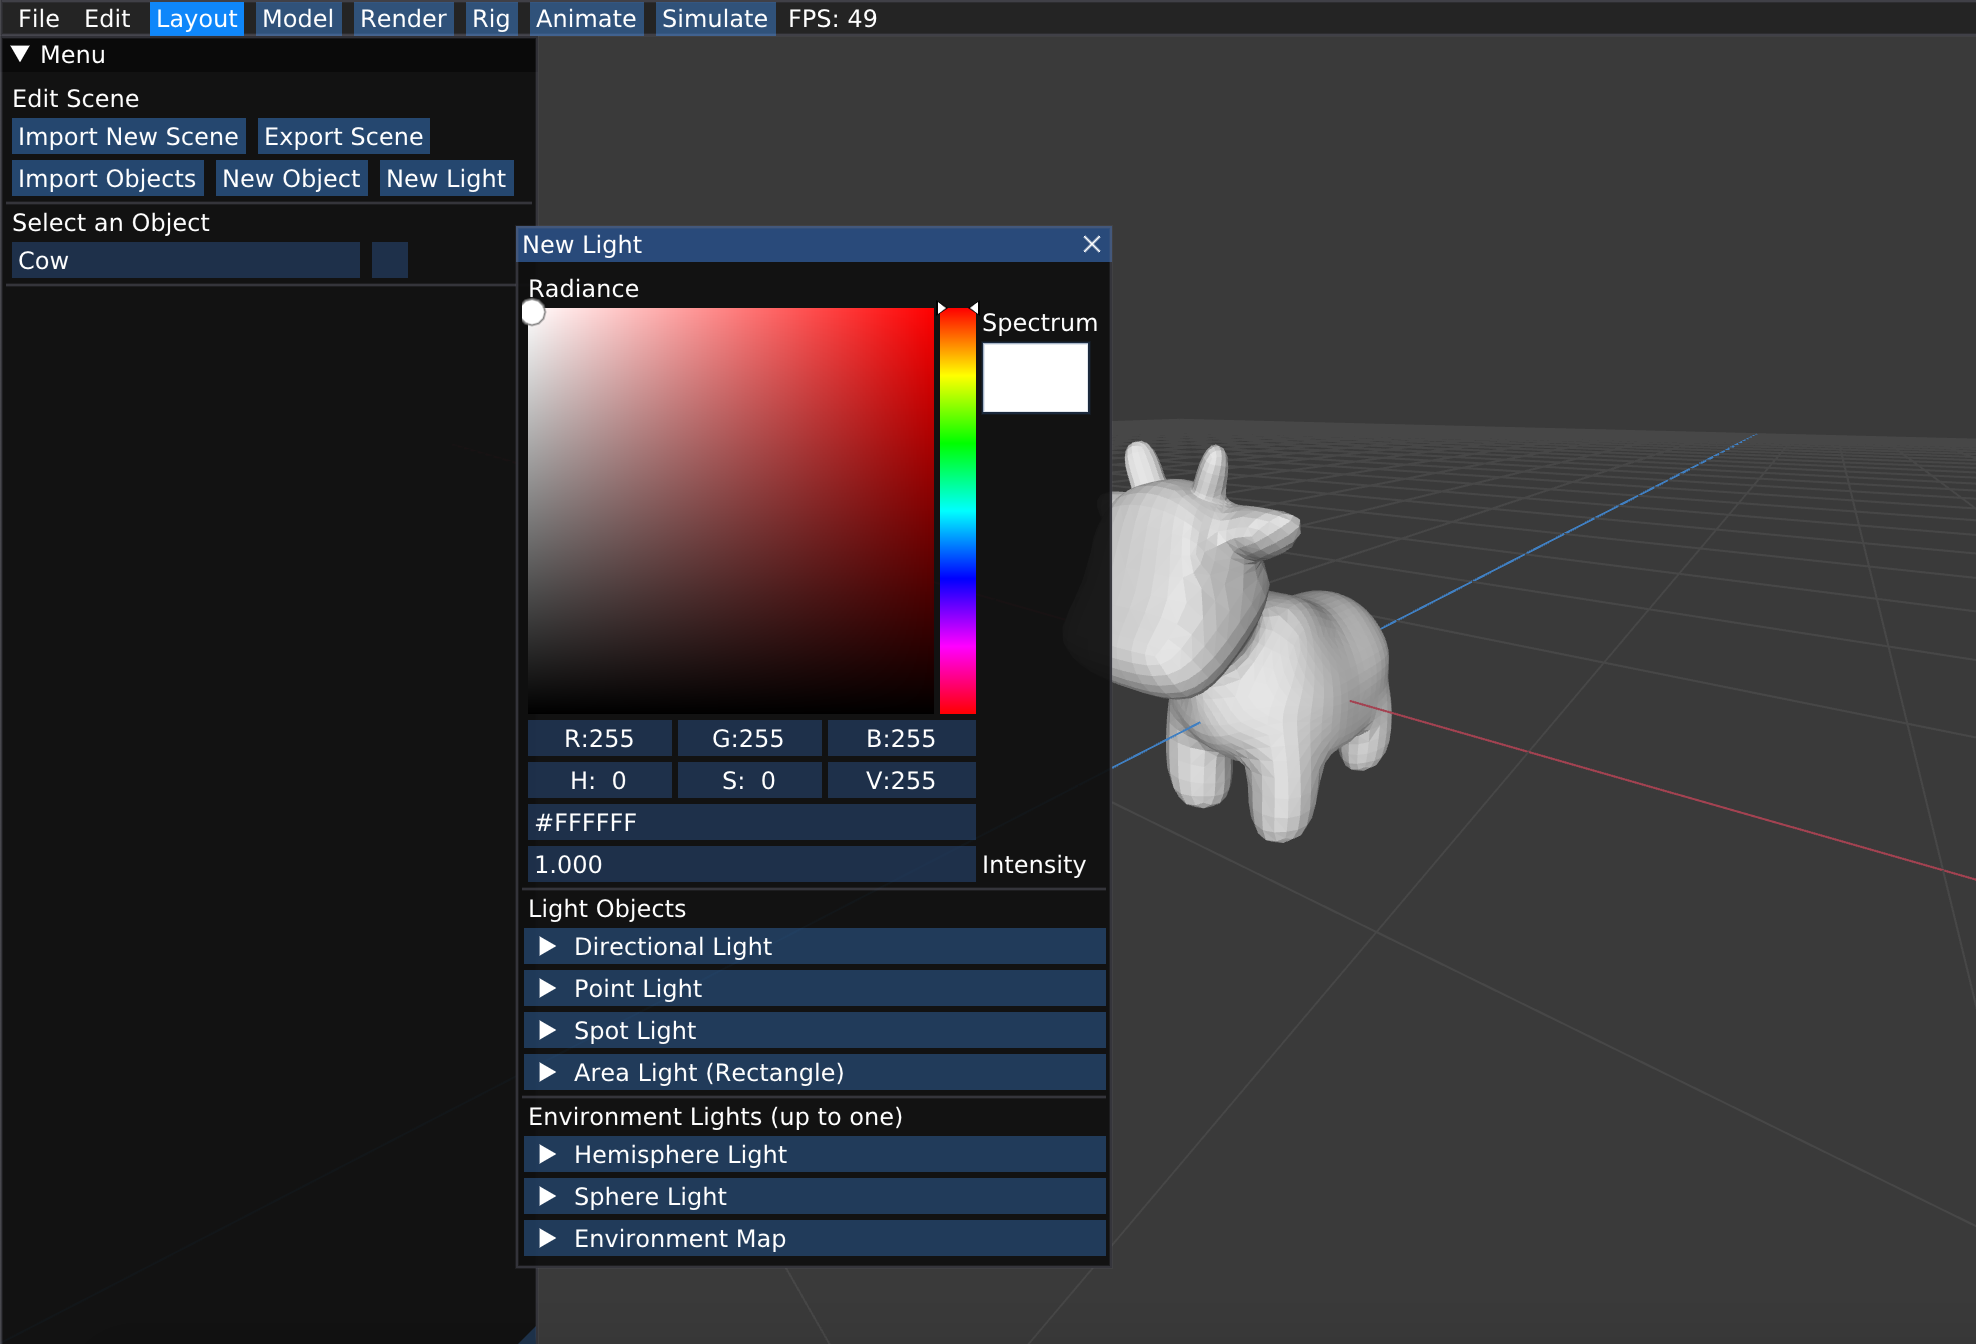
Create lights
If there are no lights in the scene, your rendering will be nearly all black. To create a lighting for your scene, simply go to the menu on the left side, click “New Light”, and you will be able to choose from a variaty of light objects and environmental lights. Point, rect, and directional light implementations are given to you in the starter code. Please see the corresponding documentation for more information about light types.). Not that some scenes already have light sources in them.
Enable Ray Logging for Debugging
In Render mode, simply check the box for “Logged Rays”, and you would be able to view the camera rays that you generated in task 1 when you start render.
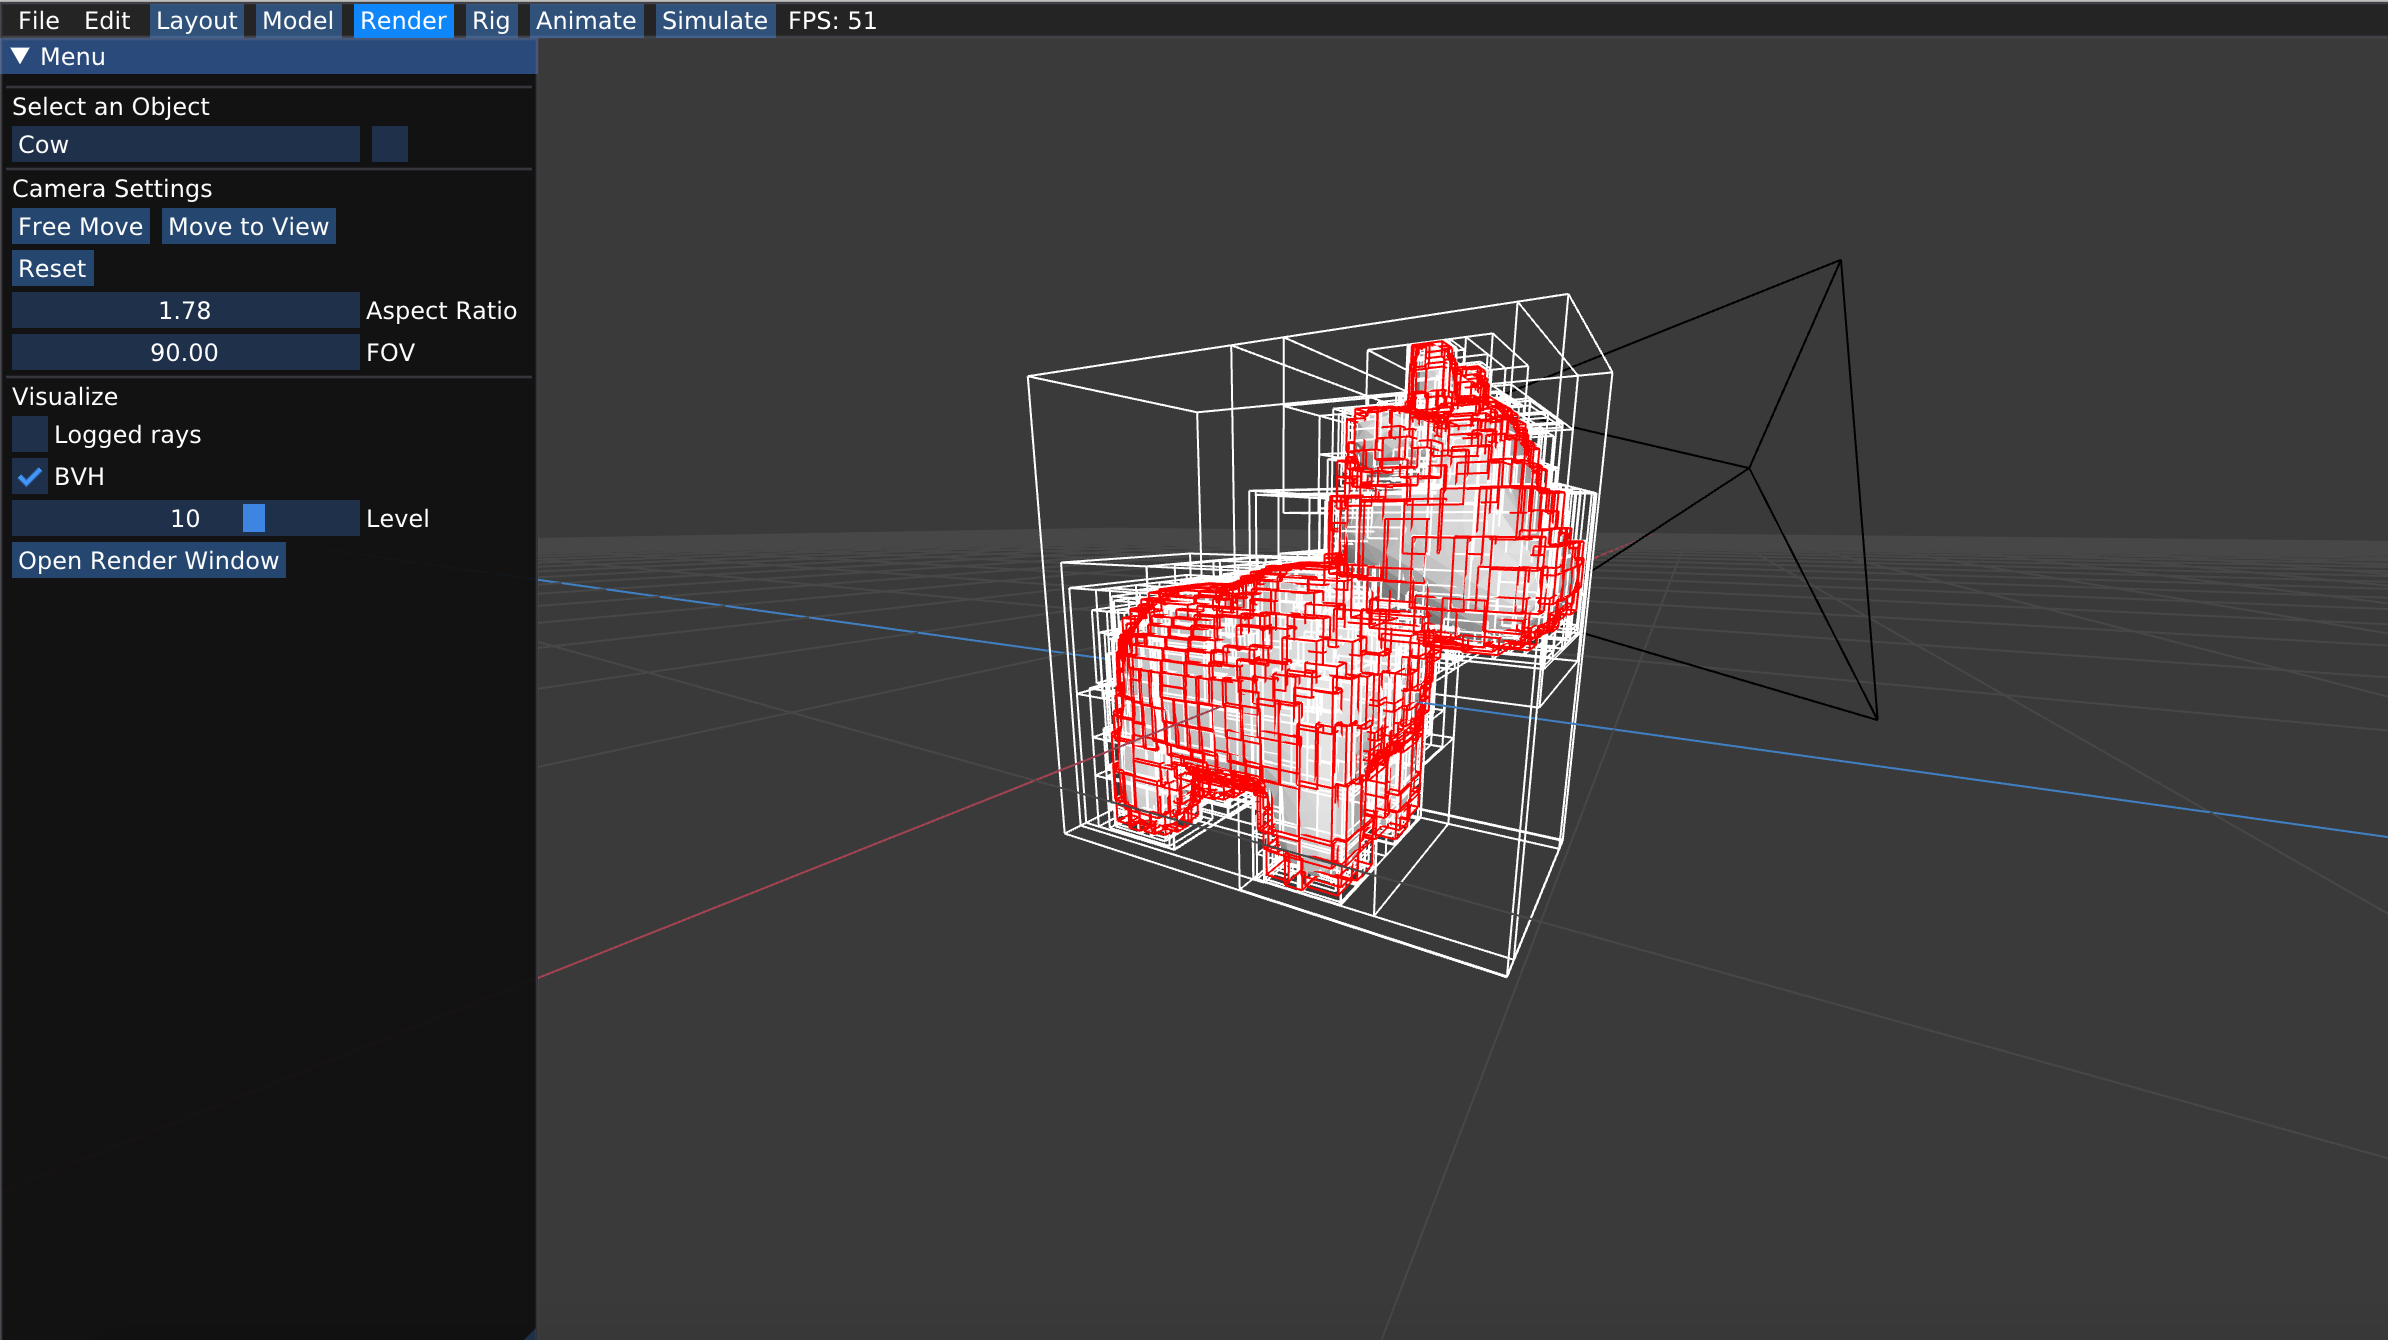
Visualize BVH
In Render mode, simply check the box for “BVH”, and you would be able to see the BVH you generated in task 3 when you start rendering. You can click on the horizontal bar to visualize nodes at different levels of your BVH.
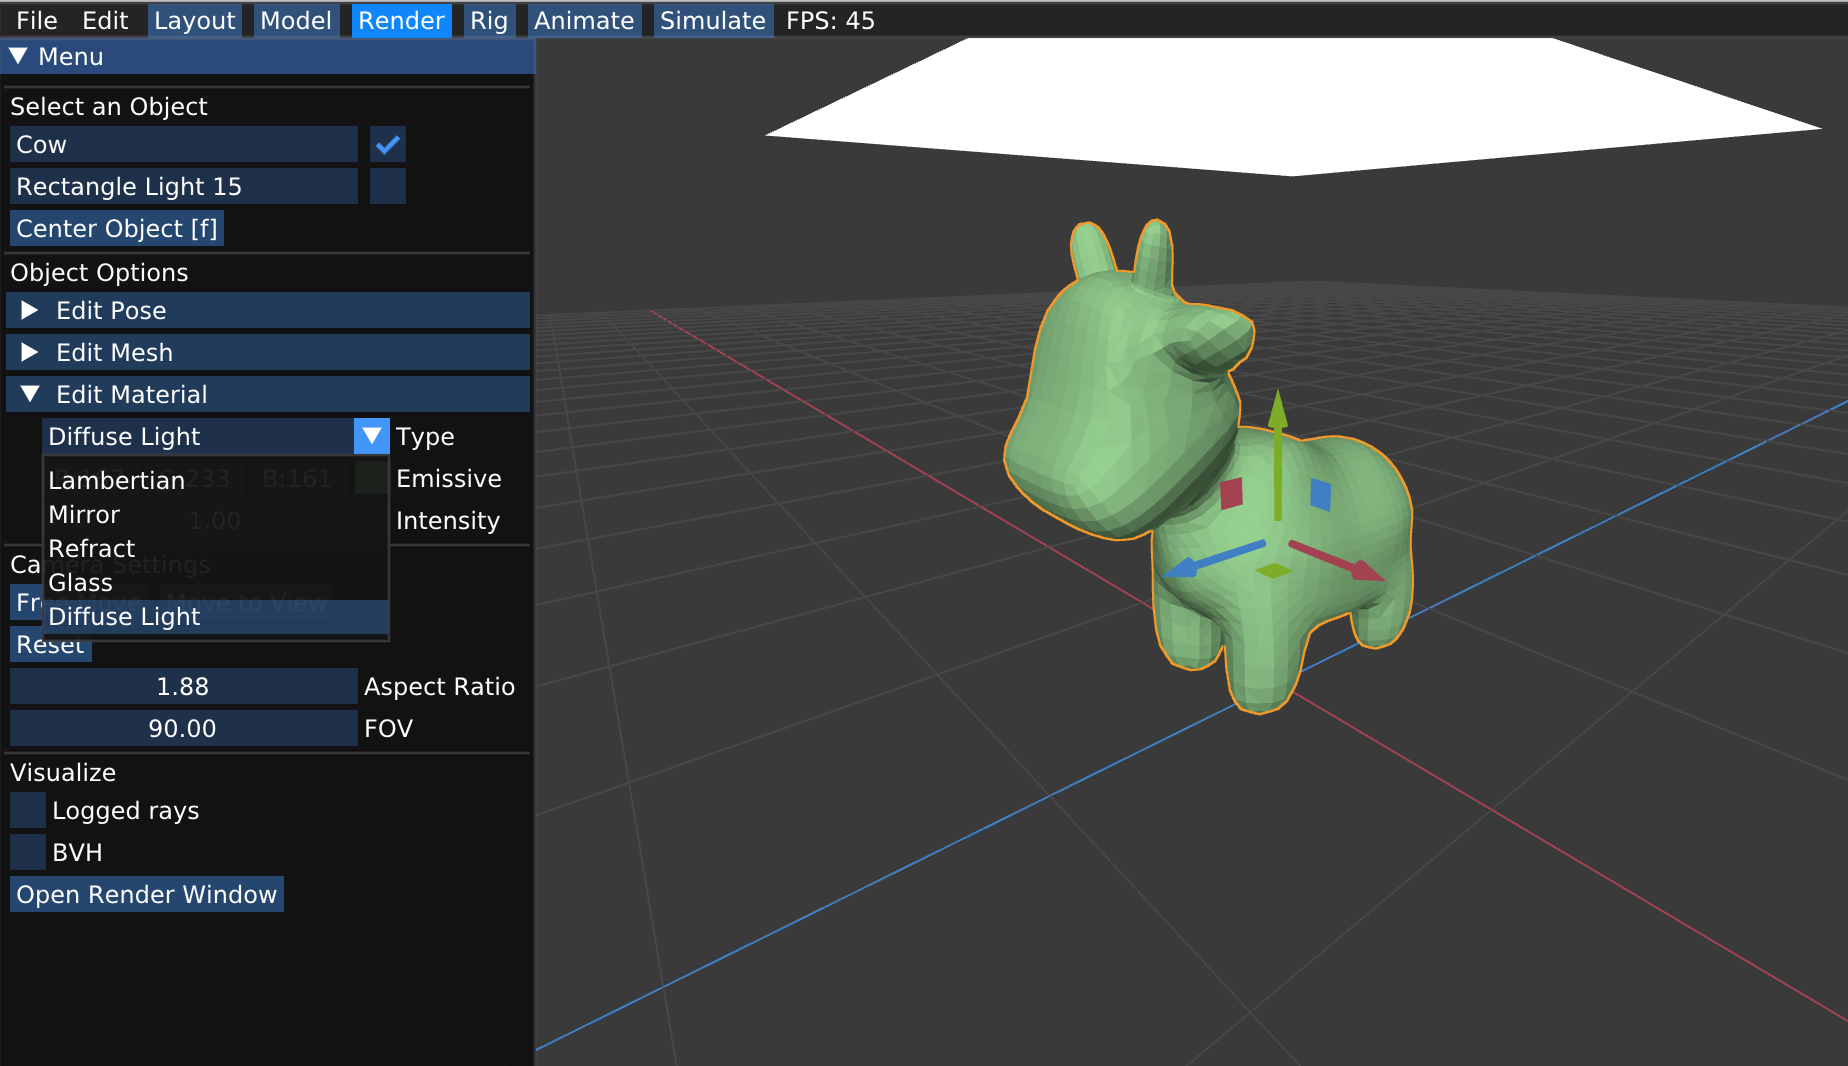
Materials and Other Object Options
You can change the material and other property of your mesh by selecting the object and choose “Edit Pose”, “Edit Mesh”, and “Edit Material”. For example, you can make a colored cow by “Edit Material” -> “Diffuse light”, and pick a color that you like.